REST services
A REST service (RestService) defines a connection to an external HTTP API, with one or more operations a rule can call. REST services are created and edited in the Data section; a rule calls an operation using the Execute REST Operation action.
Create a REST service
-
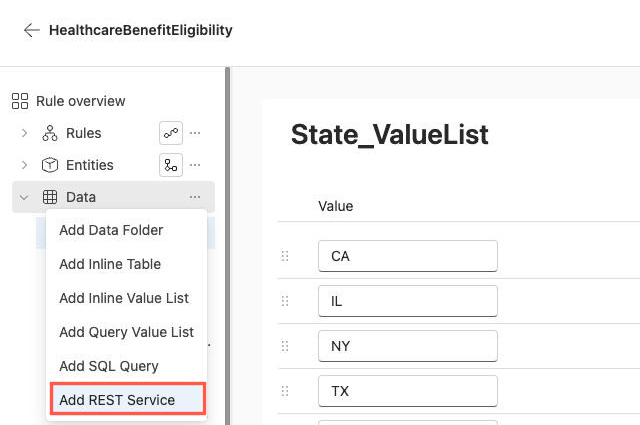
In the Data section, open the ellipsis menu (...).
-
Select Add REST Service.
-
Enter a name for the service.
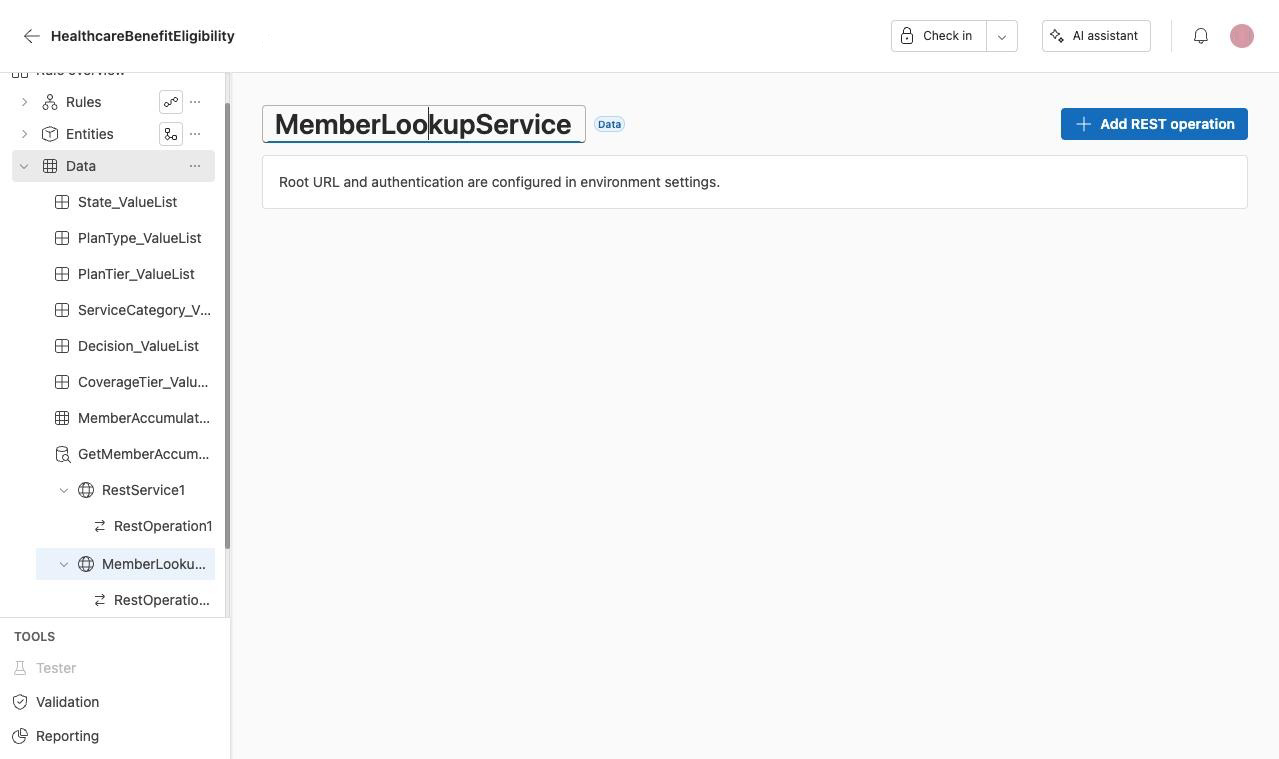
Root URL and authentication are configured in environment settings. An admin sets these as a tenant override in the Portal, keyed by the service's name, not in the rule application itself.
If a rule application was authored in irAuthor Desktop and already carries REST credentials, those values stay in the rule application's own XML and round-trip through the catalog on check-in. Web authoring doesn't store or display them. To run that rule application in a different tenant, set the tenant override there as well.
Operations are authored by hand. Importing a Swagger or OpenAPI definition isn't supported, and a response doesn't have a typed schema (matching Desktop's current REST service support).
Add an operation
Each operation on a REST service defines one HTTP call.
-
Open the REST service and add an operation. Define its operation inputs (the values a rule will supply when it calls this operation).
-
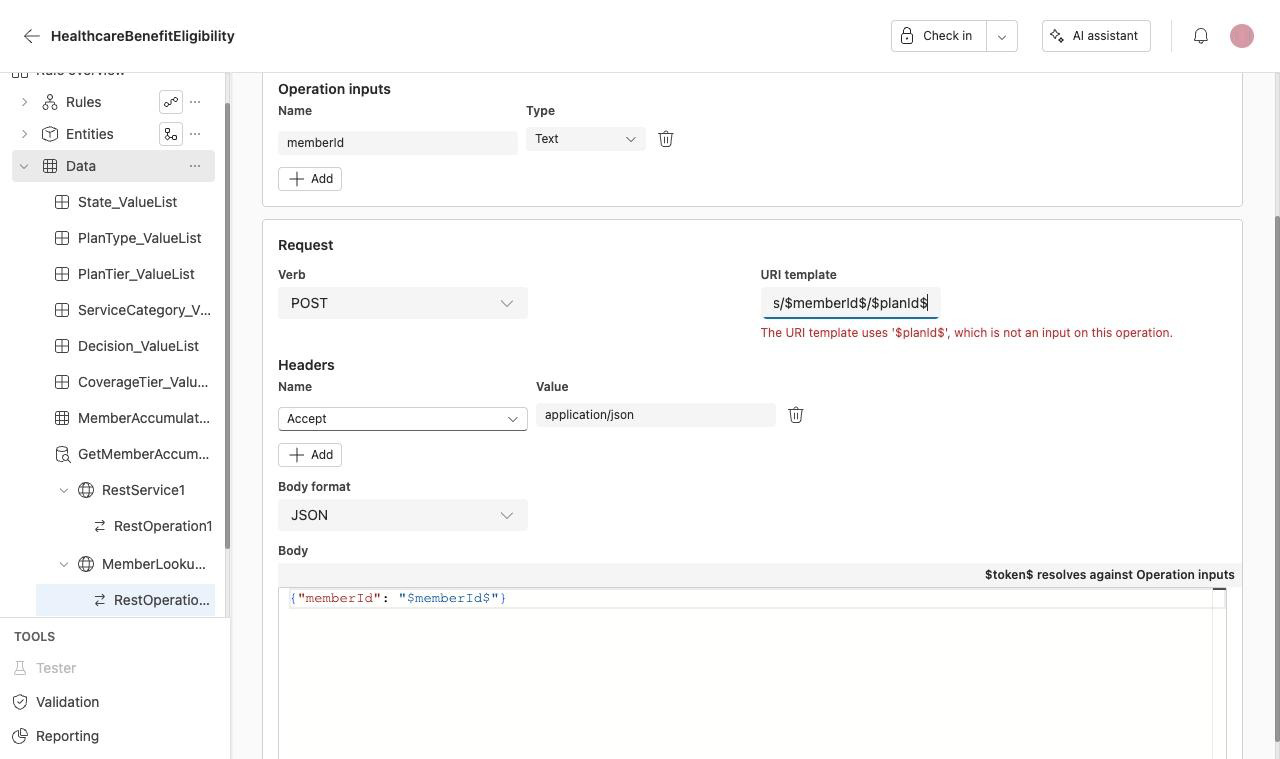
Set the request verb (GET, POST, PUT, or DELETE) and the URI template. Reference an operation input in the URI template with
$InputName$syntax. For example:/members/$memberId$. -
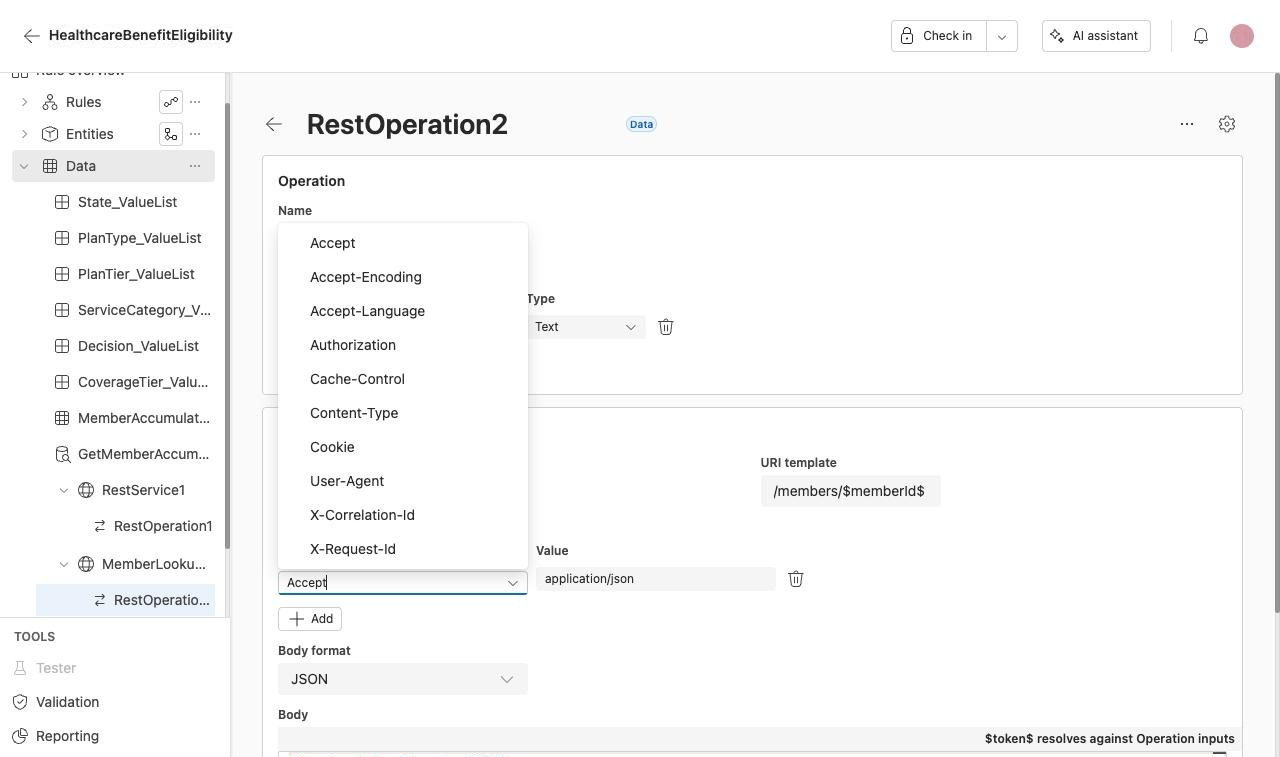
Add any headers the request needs. Headers are chosen from a fixed list of standard names (Accept, Accept-Encoding, Accept-Language, Authorization, Cache-Control, Content-Type, Cookie, User-Agent, X-Correlation-Id, X-Request-Id) rather than entered as free text.
-
For a verb like POST that sends a body, choose a body format (XML, JSON, or Form encoded), then write the body. An operation input is referenced in the body the same way as in the URI template (
$InputName$).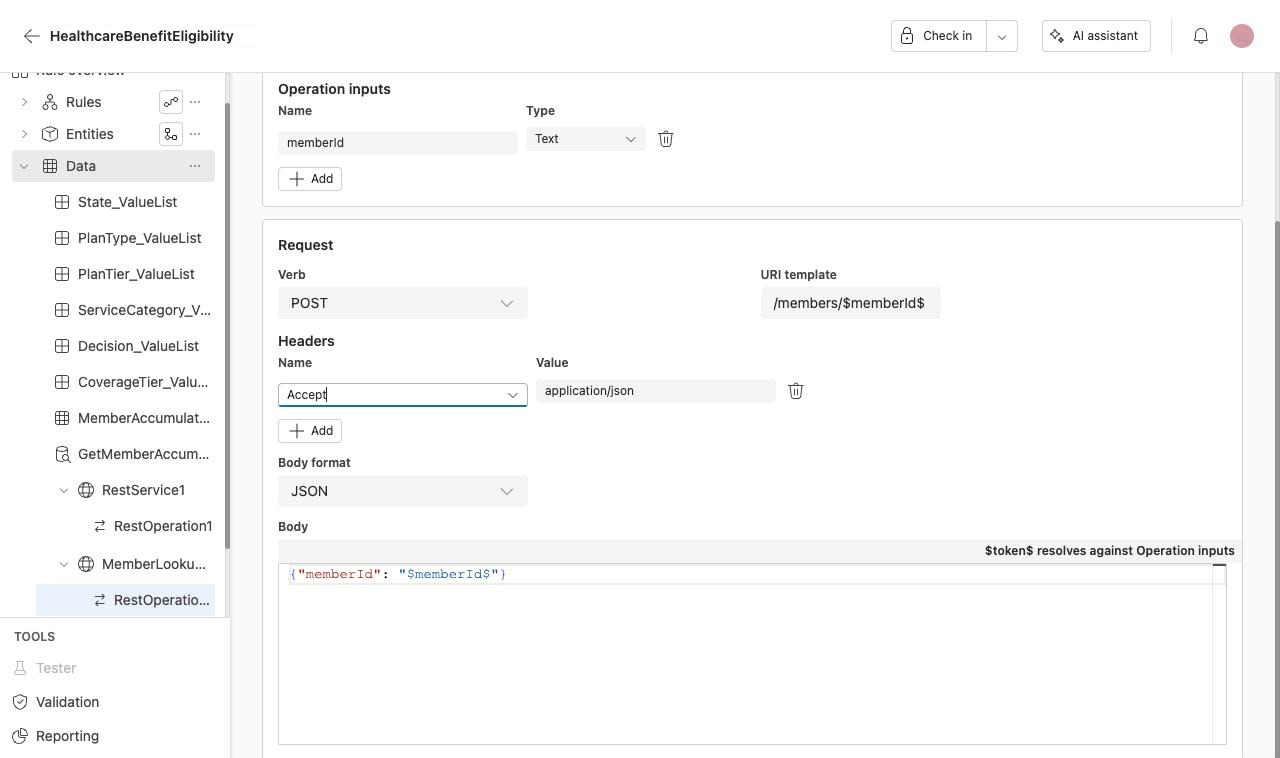
Mistakes are caught as you type. For example, referencing an input in the URI template that the operation doesn't define produces an error naming the problem directly.
Operation settings
Each operation has its own settings, opened from its gear icon:
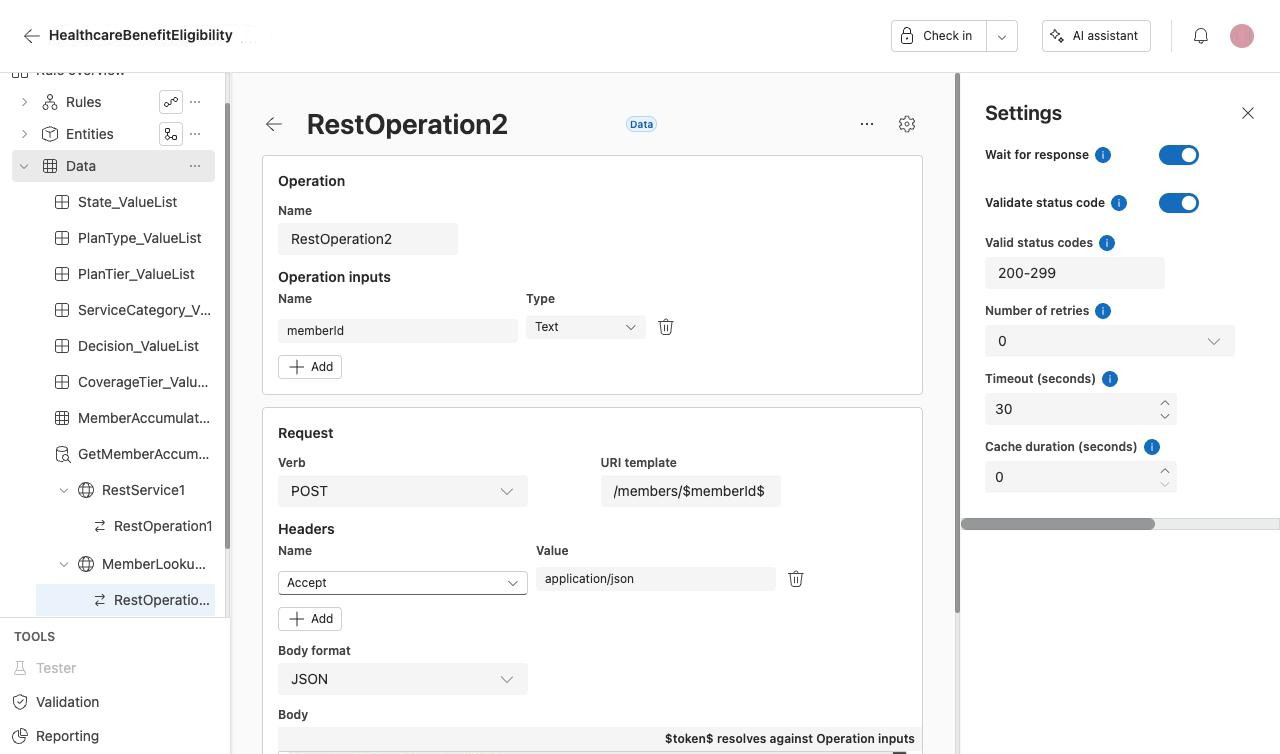
Wait for response
Whether the action waits for a reply before continuing.
Validate status code
Whether a reply's status code is checked against the valid codes below.
Valid status codes
Which status codes count as a success.
Number of retries
How many times to retry the call if it fails.
Timeout (seconds)
How long to wait for a reply before giving up.
Cache duration (seconds)
How long to reuse a previous reply instead of calling again.
Calling a REST service from a rule
Deleting a REST service that an operation still uses is allowed. Any rule that calls one of that service's operations reports that the service is missing.
Overriding a REST service for a test run
When testing, you can override a REST service's connection for that test run only, without changing the rule application or the environment's configuration:
-
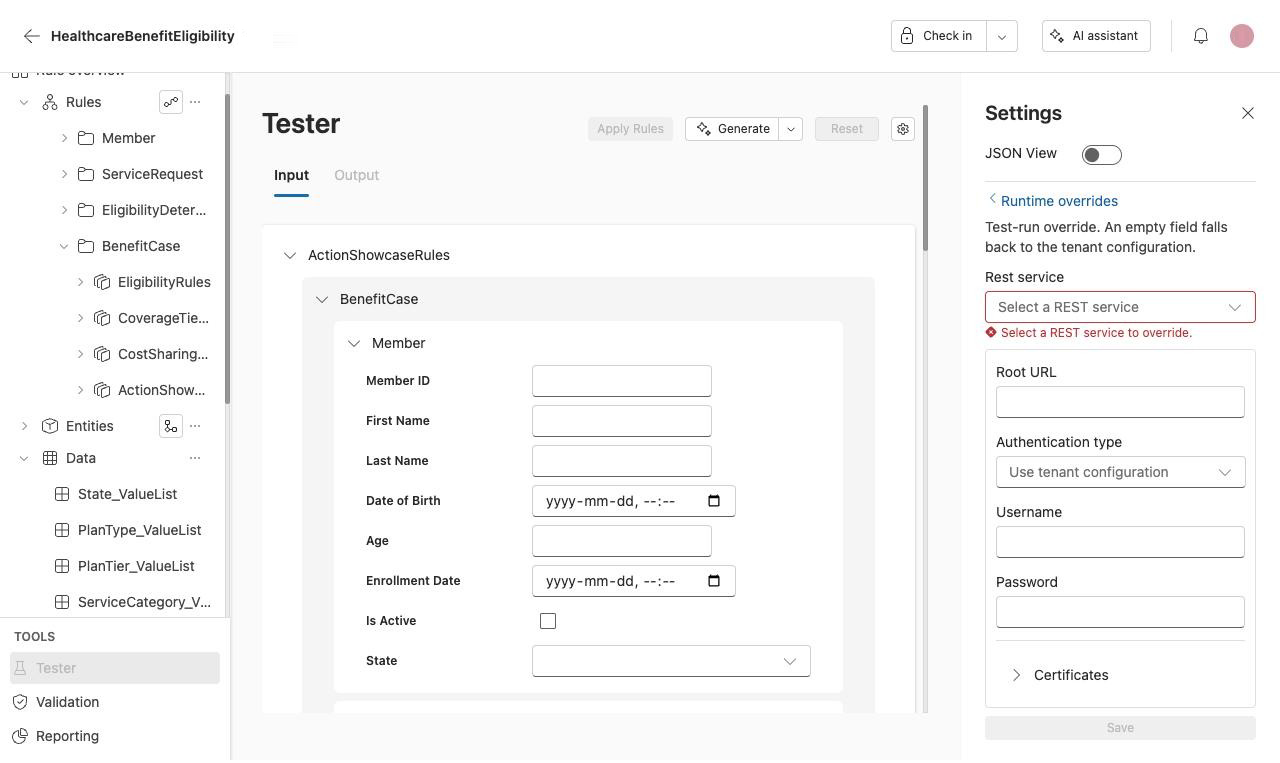
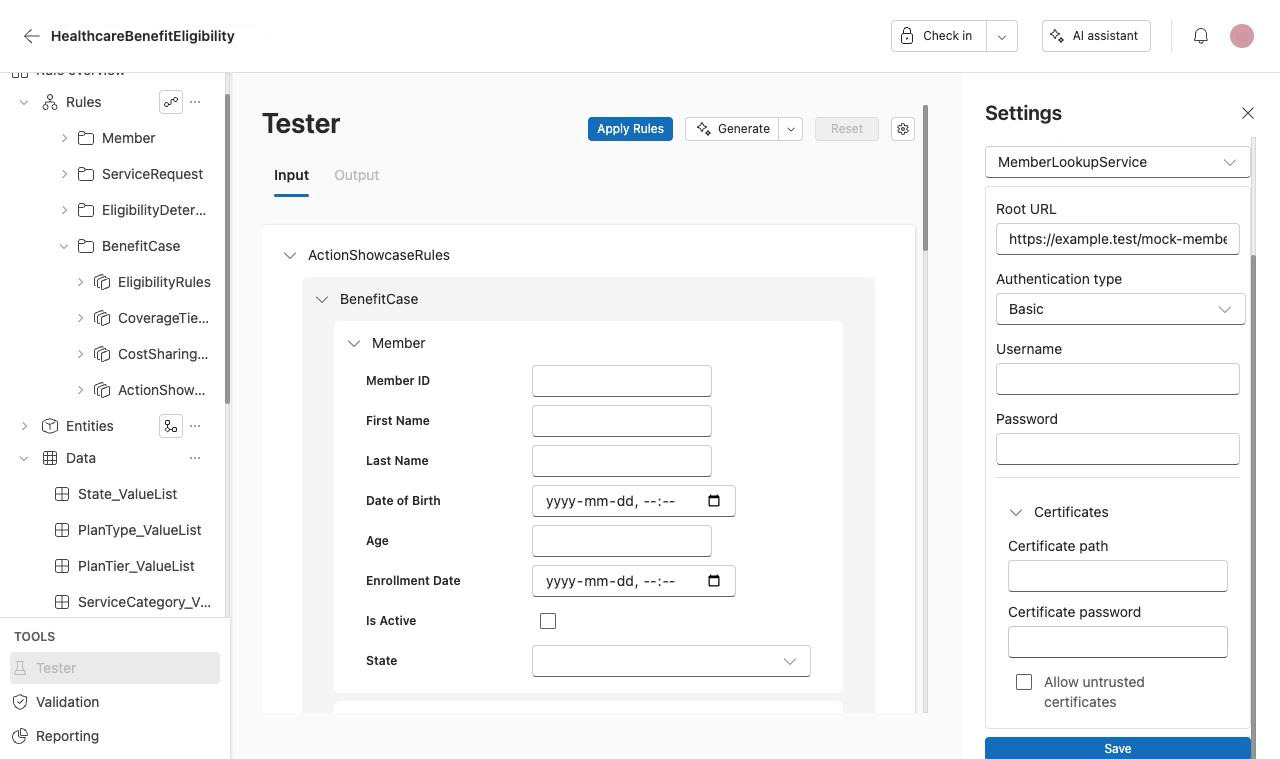
Open the Tester and select Settings.
-
Under Runtime overrides, select Add override and pick the REST service.
-
Override the Root URL, if needed.
-
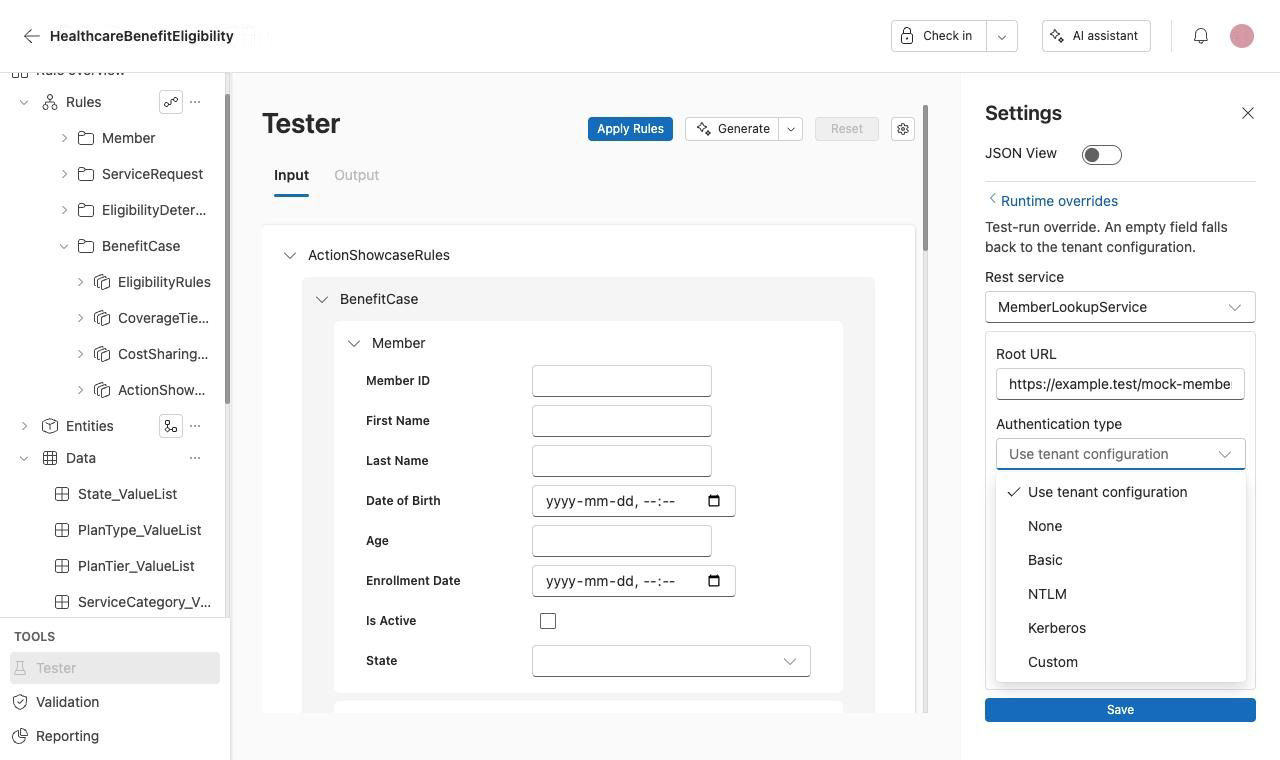
Override the Authentication type: Use tenant configuration, None, Basic, NTLM, Kerberos, or Custom. Choosing Basic reveals Username and Password fields.
-
Expand Certificates to override the certificate path, certificate password, or to allow untrusted certificates.
-
Select Save.
A runtime override lasts for the current session only. Closing the Tester without saving discards it; nothing is written to the tenant configuration.