Named Credential Configuration
Named Credentials are used by the Apex code to make secure HTTP requests to the Rule Execution Service. Currently, there are two types of Named Credentials available:
- Named/External Credentials (new) – These are created with the new named credential process introduced when Salesforce revamped named credentials in 2023. This new process provides additional authentication options, more granular access control, and will be supported for the foreseeable future.
- Legacy Named Credentials (old) – These are named credentials that were created prior to Salesforce's revamp of the named credential process. While it is still possible to create legacy named credentials today, it is not recommended – Salesforce has stated they will be discontinuing them at an unspecified date in the future. For additional information regarding setting up a Legacy Named Credential, you can find those instructions in Legacy Named Credential Configuration.
Important: If you have a legacy named credential set up from prior to the InRule 5.8.1 release, you will need to delete your legacy named credential before you will be able to take advantage of the new Named/External credentials. A warning message will display to make you aware of this when testing your connectivity on the InRule application's configuration page.

The instructions below will walk you through the process for setting up a Named/External Credential.
Setting up the Named/External Credentials
The InRule managed package includes pre-configured named and external credentials for your convenience. Before you can make use of them, you will need to follow the steps below to finish the setup using your user-specific information.
To begin, navigate to the Named Credentials settings page and locate the named credential called InRule ApiKey Credential.
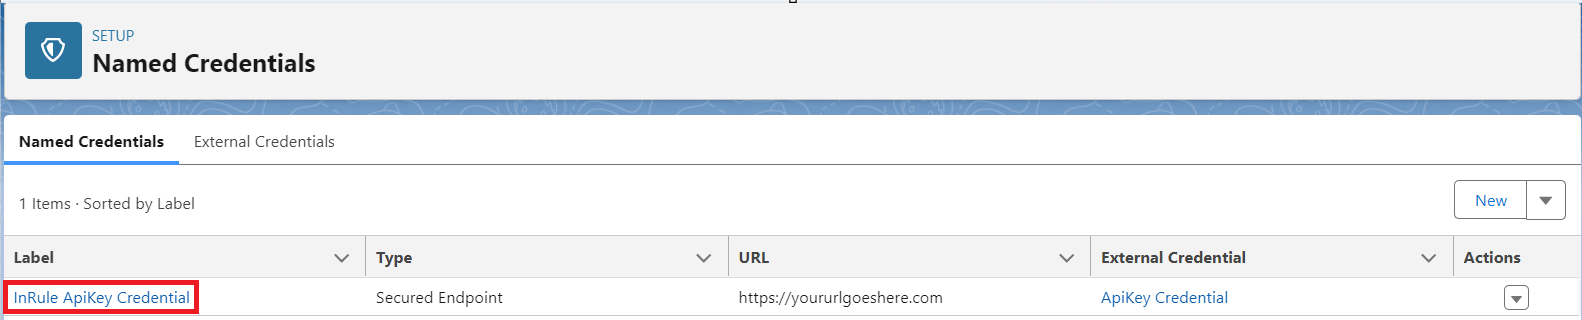
Click on the label to be taken to the settings page for this named credential. Click on the edit button in the top right corner.
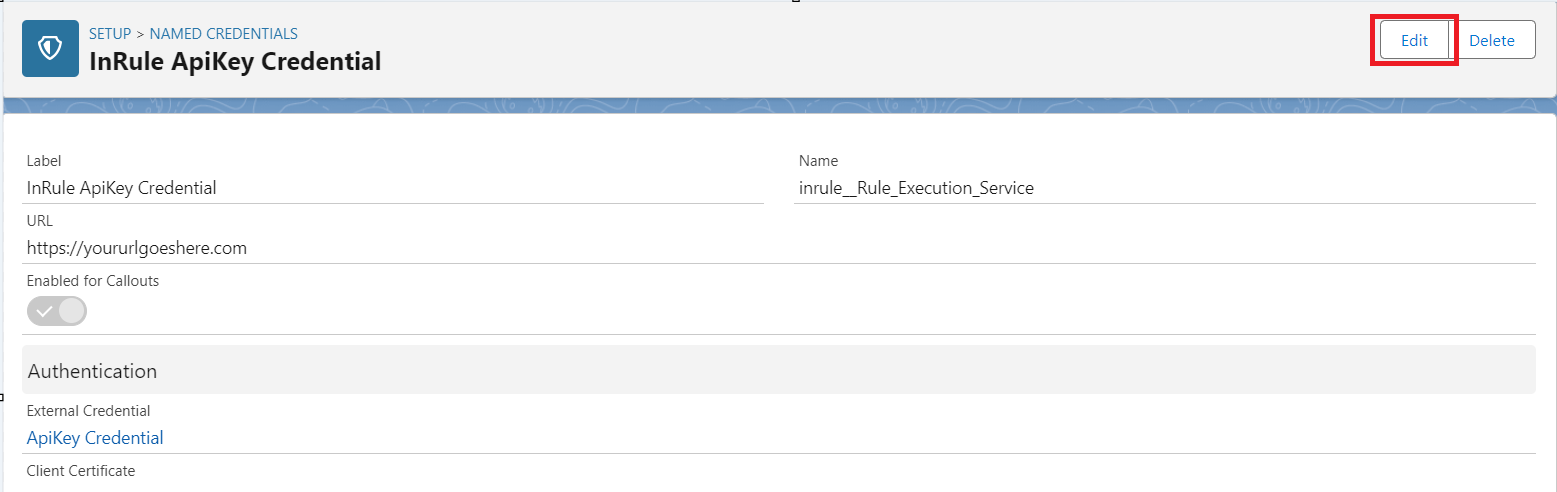
| URL | URL for the rule execution service. - For self-hosted tenants, this can be found in the Azure portal in the overview section for the app service created earlier. For example, https://sampleservice.azurewebsites.net- For SaaS tenants, this can be found on the Provisioned Resources page available from the cogwheel icon in the top right corner of the InRule SaaS Portal. |
Replace the value in the URL field with the URL for the rule execution service. Save your changes when done.
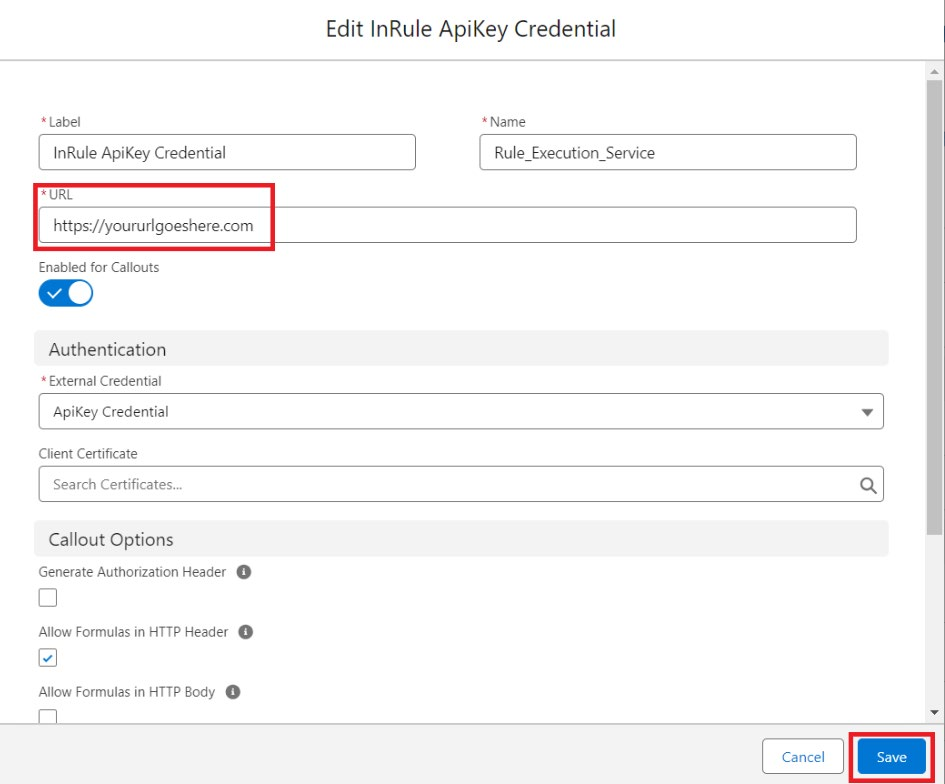
Navigate back to the named credential settings page by clicking the Named Credentials link at the top of the screen.

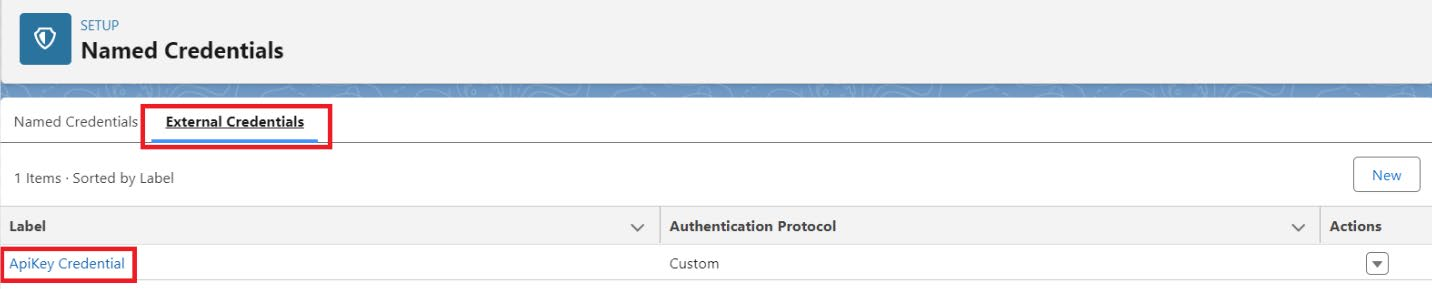
Once there, click on the External Credential tab and find the external credential named ApiKey Credential. Click on its' label to be taken to its' overview page.
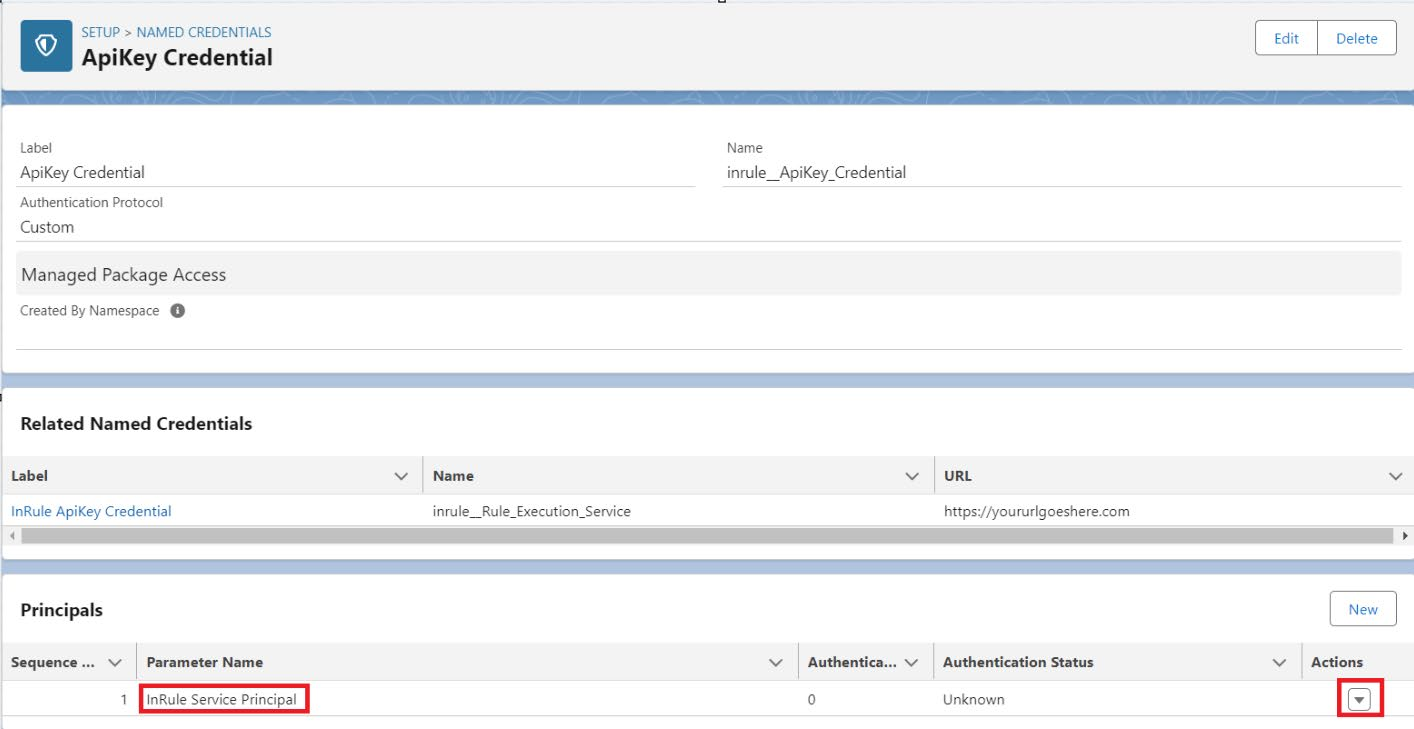
Locate the Principals section and find the principal named InRule Service Principal. Click the drop-down arrow on the right side of the screen and click the edit button.
Click the Add button next to the Authentication Parameters section to add a new authorization parameter. The Name field must be set to ApiKey.
| API key | A unique key that allows users to verify their identity when interacting with the rule execution service. Your key can be located in one of two locations: - For self-hosted tenants, if you have not done so already, you will need to update your parameters as shown here – the api key configured there will be the same one you use in Salesforce. - For SaaS tenants, your Primary and Secondary API Keys will be located in InRule SaaS Portal. In the top right of the Portal, press the setting cogs and navigate to the Configuration page. You can find your API Keys under "Execution Server Settings". |
The Value field will need to be set to your API key. Save your changes when done.
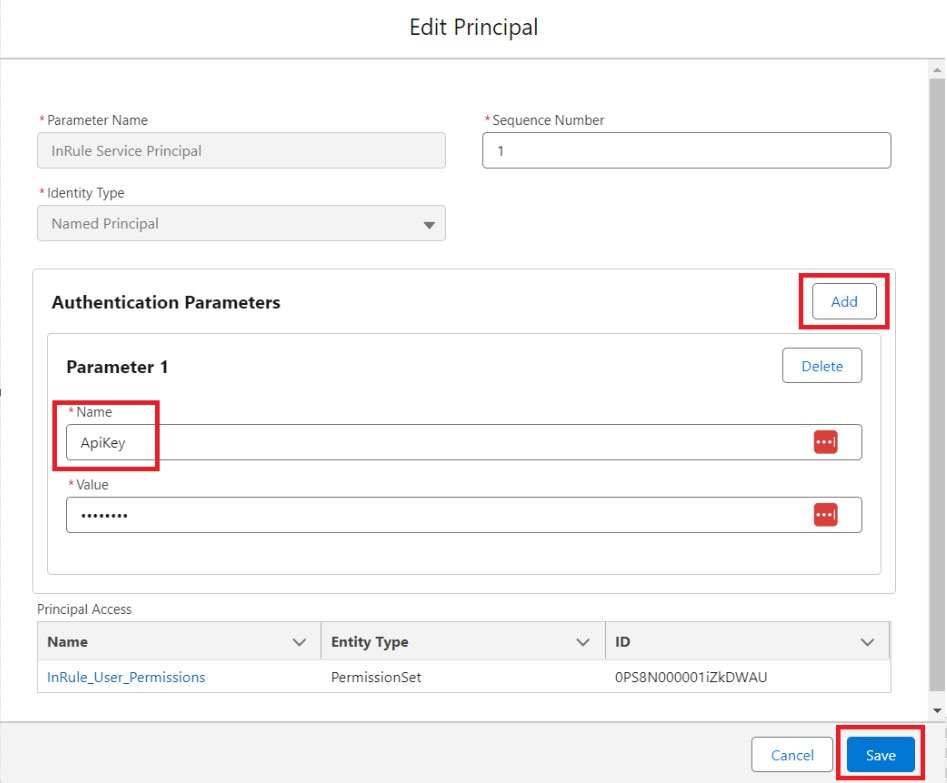
The named credential should now be configured correctly. Before your users will be able to make use of the named/external credentials, you will have to give them access. This can be accomplished either by assigning a permission set, or by granting the user's profile access.
Providing Named Credential Access via Permission Set
In order to grant access via a permission set, you will need to assign the InRule_User_Permissions permission set to any user(s) you want to enable the named credential for.
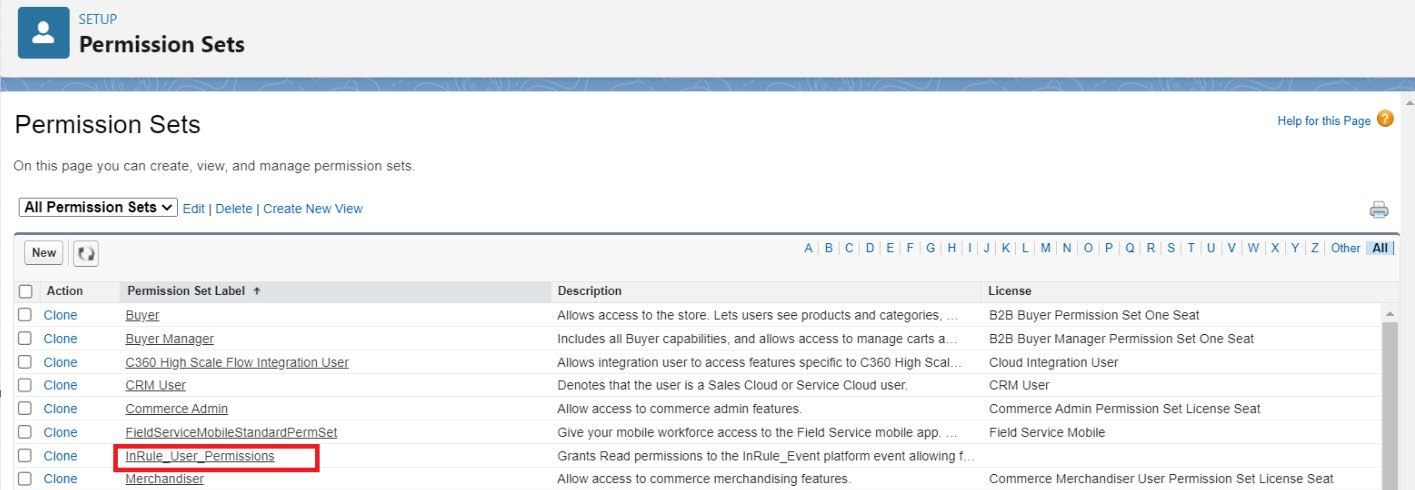
To begin, navigate to the Permission Sets setup page. Once there, locate the InRule_User_Permissions permission set in the list and click on its' label.
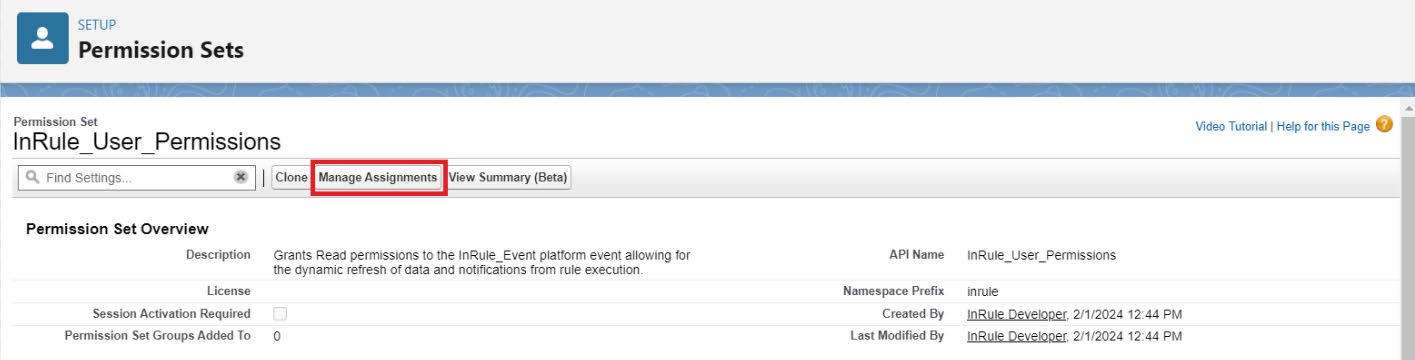
Once on the permission set's overview page, click on the Manage Assignments button above the permission set's description.
On the following screen, click the Add Assignment button on the right side.

From here, select any user(s) you wish to grant access to the named/external credential to. Note: You can click the checkbox next to the Full Name column to select all users displayed.
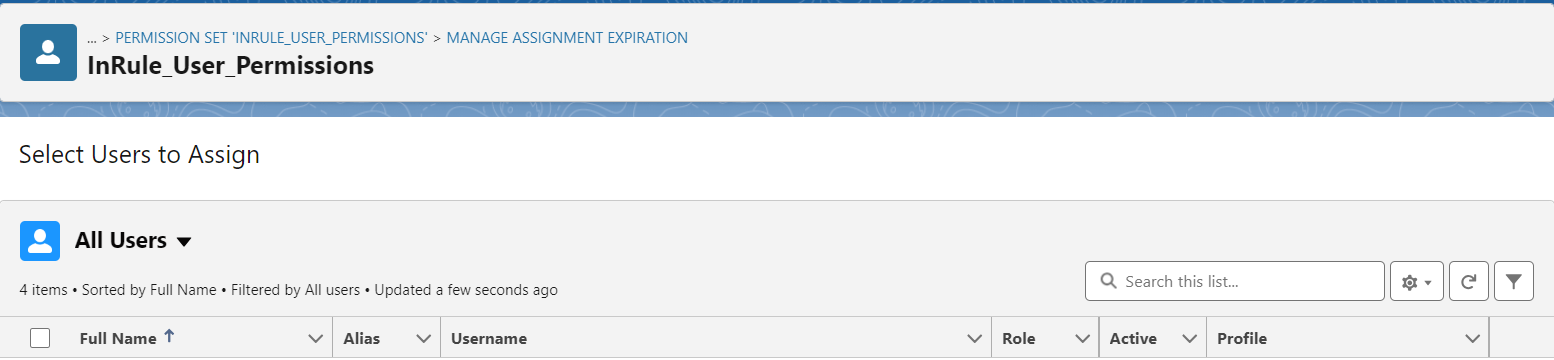
Once done, select the Next button in the bottom right corner of the screen. You will be taken to the assignment expiration management screen. From here, you can optionally provide an expiration date for the permission set assignment. Once done, click the Assignment button in the bottom right corner.
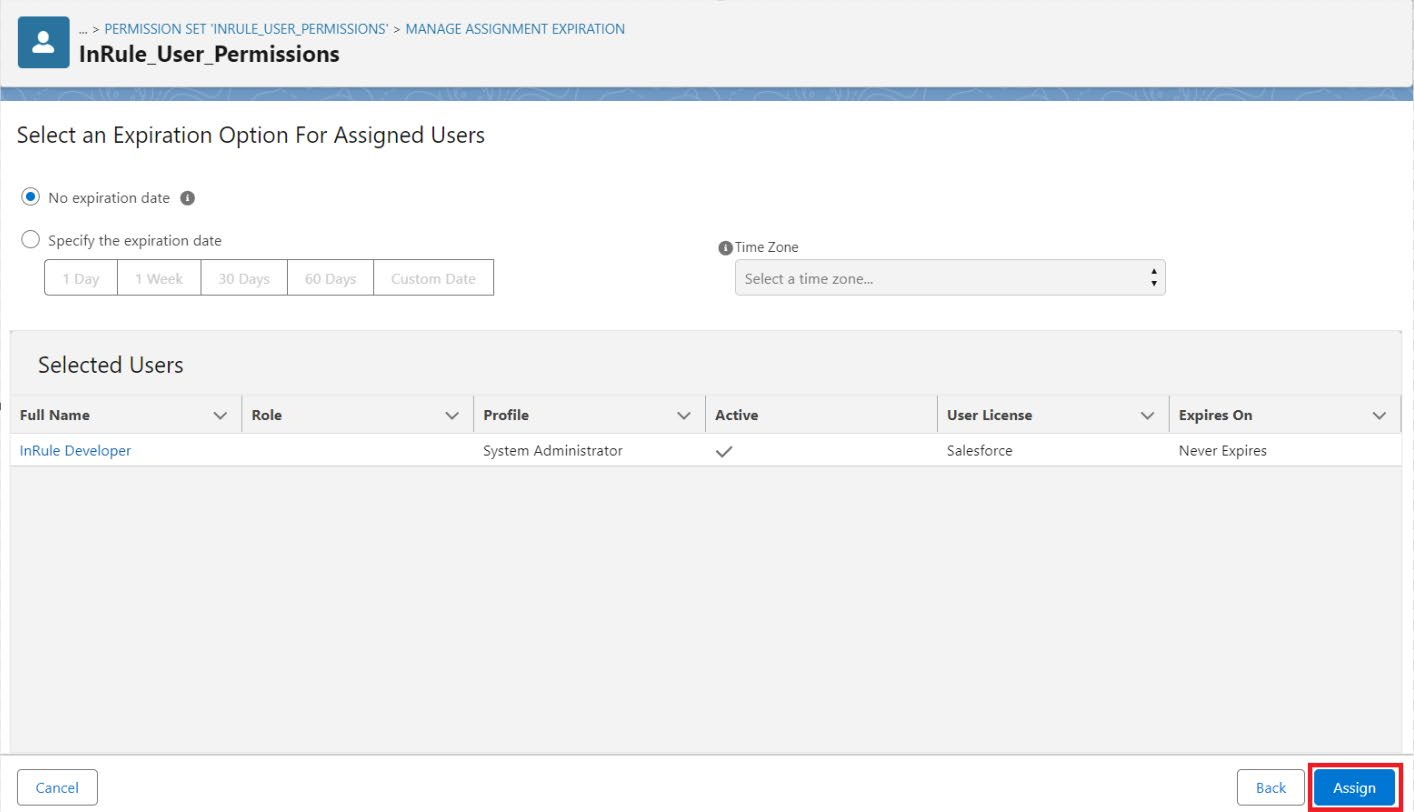
Your user(s) should now have access to the named/external credentials and should now have access to make authenticated callouts.
Legacy Named Credential Configuration
Legacy named credentials offer an older, less robust way of setting up authenticated callouts. They are used by the Apex code to make secure HTTP requests to the Rule Execution Service.
In the InRule App, select the "Configuration" tab
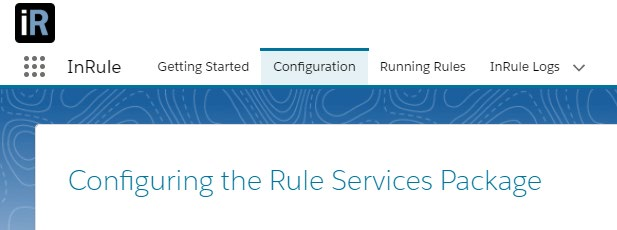
Under the "Named Credentials" header, click the link the "Edit Named Credentials" link

Press the drop-down arrow on the "New" button and select "New Legacy".

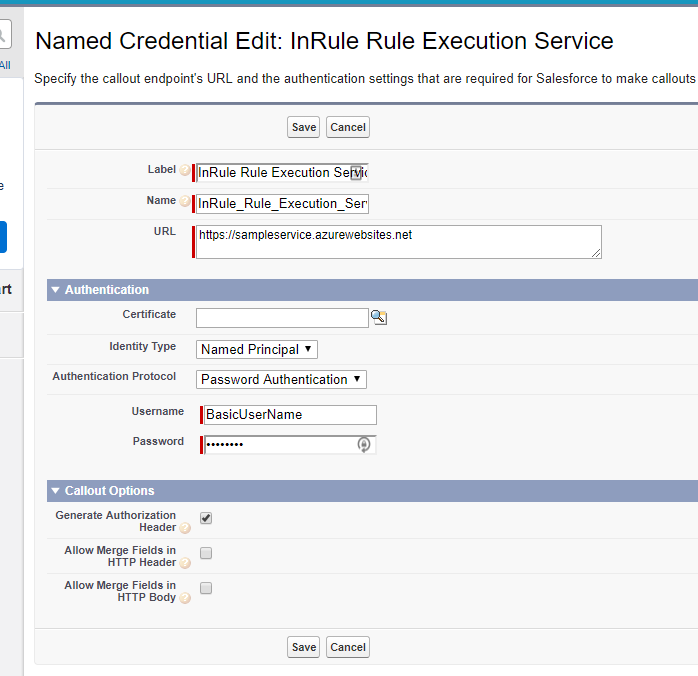
| Configuration Form Fields | |
|---|---|
| Label | This should be set to InRule Rule Execution Service. This value is not required to match exactly, but if you choose something else, make sure to replace the autogenerated Name with the correct one |
| Name | This value must be set to InRule_Rule_Execution_Service. The name field is how the Named Credential is retrieved in the Apex code, so this needs to match exactly |
| URL | URL for the rule execution service in Azure. This can be found in the Azure portal in the overview section for the app service created earlier. For example, https://sampleservice.azurewebsites.net |
| Identity Type | Named Principal |
| Authentication Protocol | Password Authentication |
| Username | Username for accessing the rule execution service. This should be the same value chosen earlier for the 'ruleServiceUsername' parameter when setting up the service in Azure or established via the InRule SaaS Portal |
| Password | Password for accessing the rule execution service. This should be the same value chosen earlier for the 'ruleServicePassword' parameter when setting up the service in Azure or established via the InRule SaaS Portal |
| Callout Options | Make sure 'Generate Authorization Header' is checked |